Today's entry is a bit different. No recipe. Just a recommendation. Even a plea.
Jamie Oliver's "Food Revolution" is back for it's second season!!
I can't tell you how excited I am about that. If you missed out on last year's, be sure to get in on the action this year.
ABC Tuesdays at 8/7 central.
Or if you miss it live, you can watch it online at abc.com
It is SO important that we know what's in our food ~ how it's grown/raised, processed, cooked. This show is a great introduction into becoming a better educated consumer. And, it will more than likely surprise you- even shock you about what is really going on with food in this country and in our schools.
Support Jamie, and his goal to create a massive food revolution!!
What can you do? Sign the petition ~
http://www.jamieoliver.com/us/foundation/jamies-food-revolution/sign-petition
Wednesday, April 20, 2011

Wednesday, April 6, 2011
Kitchen Essentials ~ Garlic
In my mind, there isn't anything much better than ... (drumroll).... Garlic!
I. Love. Garlic.
.... do they make t-shirts that say that?... They should. Whoever "they" may be. :)
Here are a few ESSENTIAL tips I've picked up over the years about Garlic.
1. First and foremost, always buy garlic fresh. Not, the jarred mush at the store. If I can convince you of nothing else, this is the most important. Who knows how long that garlic has been sitting in that jar, or worse yet, what has been added to it to keep it from going brown.
The good news??.... preparing fresh garlic takes about 1 minute, and is SUPER easy, as you will see if you keep reading :)
2. When buying fresh garlic, there's a couple things to look for.
Be sure that the head you bring home is nice and firm, with the cloves firmly in place. Don't buy the ones that look dry, separated, and peeling. Nor do you want any green shoots growing out the top.
3. Mincing garlic becomes very easy and quick when you use this helpful tip: Once you have the skin off, which can be done by lightly pounding down on it with the palm of your hand or the side of a large knife (don't cut yourself), get out your microplane or fine grater. Grate away, right into your pan or dish!! And that's it! **Some graters may be too fine for garlic. They come in differing sizes. In this case you want a medium grate.

4. How do you get the garlic smell off your hands? There's a much better way than scrubbing with soap and water! Simply rub your fingers on some stainless steel and the smell will mysteriously disappear :)
5. Lastly, try a new way to prepare garlic, and add a TON of natural sweetness and complexity to your dishes ~ Roast your garlic. I like to roast whole heads by simply cutting off the top of the head, keeping the rest in tact. Then, drizzle the exposed top cloves with olive oil, salt and pepper. Wrap tighlty in olive oil, and throw in the oven at 350 or 375 for 30-45 minutes. Let it cool slightly. Then, squeeze out the soft, lusciously sweet and mellow cloves.
The other option is to separate each clove out and place in a small baking dish, cover with olive oil, salt & pepper, and even a few red pepper flakes if you like. Cover tightly with olive oil, and bake for 30-45 minutes, or until the cloves are soft. The advantage to this method is you are left with garlic flavored olive oil.


So, there you have it. The top 5 things that everyone should know about garlic (in my opinion :)
I. Love. Garlic.
.... do they make t-shirts that say that?... They should. Whoever "they" may be. :)
Here are a few ESSENTIAL tips I've picked up over the years about Garlic.
1. First and foremost, always buy garlic fresh. Not, the jarred mush at the store. If I can convince you of nothing else, this is the most important. Who knows how long that garlic has been sitting in that jar, or worse yet, what has been added to it to keep it from going brown.
The good news??.... preparing fresh garlic takes about 1 minute, and is SUPER easy, as you will see if you keep reading :)
 |
| courtesy of pdphoto.org |
2. When buying fresh garlic, there's a couple things to look for.
Be sure that the head you bring home is nice and firm, with the cloves firmly in place. Don't buy the ones that look dry, separated, and peeling. Nor do you want any green shoots growing out the top.
3. Mincing garlic becomes very easy and quick when you use this helpful tip: Once you have the skin off, which can be done by lightly pounding down on it with the palm of your hand or the side of a large knife (don't cut yourself), get out your microplane or fine grater. Grate away, right into your pan or dish!! And that's it! **Some graters may be too fine for garlic. They come in differing sizes. In this case you want a medium grate.

4. How do you get the garlic smell off your hands? There's a much better way than scrubbing with soap and water! Simply rub your fingers on some stainless steel and the smell will mysteriously disappear :)
5. Lastly, try a new way to prepare garlic, and add a TON of natural sweetness and complexity to your dishes ~ Roast your garlic. I like to roast whole heads by simply cutting off the top of the head, keeping the rest in tact. Then, drizzle the exposed top cloves with olive oil, salt and pepper. Wrap tighlty in olive oil, and throw in the oven at 350 or 375 for 30-45 minutes. Let it cool slightly. Then, squeeze out the soft, lusciously sweet and mellow cloves.
The other option is to separate each clove out and place in a small baking dish, cover with olive oil, salt & pepper, and even a few red pepper flakes if you like. Cover tightly with olive oil, and bake for 30-45 minutes, or until the cloves are soft. The advantage to this method is you are left with garlic flavored olive oil.


SO good, in just about anything~ pastas, mashed potatoes. Even on it's own, spread onto bread. Use your imagination :)
So, there you have it. The top 5 things that everyone should know about garlic (in my opinion :)
And remember... 2 garlics cancel eachother out. So, if you are worried about what emits from your body later, be sure to have the others in the house eat it as well. Problem solved :)
And, really, isn't garlic worth it?!...
Saturday, March 26, 2011
Homespun ~ Banana Walnut Pancakes
It's the weekend. I live for the weekend.... I love to make delicous morning treats for my family on the weekends.
Today ~ Pancakes. But not just any pancakes.... Fluffy, Buttery Pancakes~ stuffed with bananas and drenched in real Maple butter syrup .... Are you drooling yet?

Banana Walnut Pancakes:
4 cups flour
1 Tbl. + 1 tsp. baking powder
3/4 cup sugar
1 tsp. salt
6 large eggs, separated
3 cups whole milk
3/4 cup(12 Tbl.) unsalted butter, melted; plus 2 tsp. unmelted for griddle
1 tsp. real vanilla extract
2 1/2 cups sliced bananas
1 cup chopped walnuts
Maple Butter Syrup:
1 cup REAL Maple Syrup
2 sticks, unsalted butter, cut into pieces
Heat this over stove, stirring until butter is melted and combined into syrup. Keep warm.

Light and fluffy pancakes are at your fingertips! ~
Measure all the dry ingredients into a large bowl (flour, b. powder, sugar, salt). Whisk together.
In another bowl, whisk the egg yolks, milk, melted (and cooled) butter, and vanilla until combined. Whisk into the dry ingredients, until combined into a batter. Should be a little lumpy. That's a good thing :)
Whip the egg whites until they reach medium peaks (soft in the middle). Don't overwhip them. When you lift the whisk, the whites should stand up and fall over on themselves in a bit of a slope.

Gently fold half the whites into the batter. Then, fold in the remaining. Remember to be gentle as you don't want to lose all the air you incorporated into the whites. The batter should have lumps of egg whites in it.
 The batter will last in the fridge for a couple hours before it deflates too much.
**This recipe makes A LOT of pancakes. I recommend cutting it in half, which would be a perfect amount for 3-4 people.**
Heat your griddle over medium heat for a few minutes. Grease with a dab of butter, and begin making pancakes. Pour batter onto pan, then, lay a few sliced bananas and nuts on top. When you see bubbles forming on the top of the pancake, it is ready to flip ~ about 2 minutes.

When the other side is also golden brown (about 1 minute), remove the pancake onto a warming tray, or a pan in the oven (set at 200 degrees) to keep warm until you are ready to serve.
Layer extra bananas and walnuts on top, drizzle or drench (your choice :) pancakes in maple butter syrup, and devour!


Today ~ Pancakes. But not just any pancakes.... Fluffy, Buttery Pancakes~ stuffed with bananas and drenched in real Maple butter syrup .... Are you drooling yet?

Banana Walnut Pancakes:
4 cups flour
1 Tbl. + 1 tsp. baking powder
3/4 cup sugar
1 tsp. salt
6 large eggs, separated
3 cups whole milk
3/4 cup(12 Tbl.) unsalted butter, melted; plus 2 tsp. unmelted for griddle
1 tsp. real vanilla extract
2 1/2 cups sliced bananas
1 cup chopped walnuts
Maple Butter Syrup:
1 cup REAL Maple Syrup
2 sticks, unsalted butter, cut into pieces
Heat this over stove, stirring until butter is melted and combined into syrup. Keep warm.

Light and fluffy pancakes are at your fingertips! ~
Measure all the dry ingredients into a large bowl (flour, b. powder, sugar, salt). Whisk together.
In another bowl, whisk the egg yolks, milk, melted (and cooled) butter, and vanilla until combined. Whisk into the dry ingredients, until combined into a batter. Should be a little lumpy. That's a good thing :)
Whip the egg whites until they reach medium peaks (soft in the middle). Don't overwhip them. When you lift the whisk, the whites should stand up and fall over on themselves in a bit of a slope.

Gently fold half the whites into the batter. Then, fold in the remaining. Remember to be gentle as you don't want to lose all the air you incorporated into the whites. The batter should have lumps of egg whites in it.

**This recipe makes A LOT of pancakes. I recommend cutting it in half, which would be a perfect amount for 3-4 people.**
Heat your griddle over medium heat for a few minutes. Grease with a dab of butter, and begin making pancakes. Pour batter onto pan, then, lay a few sliced bananas and nuts on top. When you see bubbles forming on the top of the pancake, it is ready to flip ~ about 2 minutes.

When the other side is also golden brown (about 1 minute), remove the pancake onto a warming tray, or a pan in the oven (set at 200 degrees) to keep warm until you are ready to serve.
Layer extra bananas and walnuts on top, drizzle or drench (your choice :) pancakes in maple butter syrup, and devour!

(adapted from Clinton St. Baking Company Cookbook)

Sunday, March 20, 2011
Greek Spinach ~ Feta Pizza Pie
Pizza.... I think I could eat it every day, for the rest of my life, and not get sick of it. The possibilites are endless.
And this, is one of my absolute favorites. It's meat-free. But, no one will notice. And, even the nay-sayers to spinach will devour this green pie :)

Greek Spinach~Feta Pizza
1 Pizza Crust ~ your favorite
3 Tbl. olive oil
1/2 large yellow onion, finely chopped
2 cloves garlic, grated or minced
3 oz. baby spinach
3 oz. arugala
salt and black pepper
Nutmeg
1 cup Feta cheese crumbles
1 1/2 cups Mozzerella cheese, shredded
Preheat oven to 425 degrees, along with a pizza stone, if you have one. This gives the pizza that old-world stone oven texture. A great, inexpensive addition to your kitchen.
Heat olive oil in a large saute pan over medium heat, add the onion and garlic. Cook until softened, 3-4 minutes. Add the spinach and arugala to the pan and wilt. Initially, it will be a big mound that looks like a lot, but it will shrink as it wilts down. Season to taste with salt, pepper, and a little freshly grated nutmeg.


Roll out your crust, then place on a pizza peel, dusted with a fair amount of cornmeal (so you can easily slide the pizza into the oven).
And this, is one of my absolute favorites. It's meat-free. But, no one will notice. And, even the nay-sayers to spinach will devour this green pie :)

Greek Spinach~Feta Pizza
1 Pizza Crust ~ your favorite
3 Tbl. olive oil
1/2 large yellow onion, finely chopped
2 cloves garlic, grated or minced
3 oz. baby spinach
3 oz. arugala
salt and black pepper
Nutmeg
1 cup Feta cheese crumbles
1 1/2 cups Mozzerella cheese, shredded
Preheat oven to 425 degrees, along with a pizza stone, if you have one. This gives the pizza that old-world stone oven texture. A great, inexpensive addition to your kitchen.
Heat olive oil in a large saute pan over medium heat, add the onion and garlic. Cook until softened, 3-4 minutes. Add the spinach and arugala to the pan and wilt. Initially, it will be a big mound that looks like a lot, but it will shrink as it wilts down. Season to taste with salt, pepper, and a little freshly grated nutmeg.


Roll out your crust, then place on a pizza peel, dusted with a fair amount of cornmeal (so you can easily slide the pizza into the oven).
Top the pizza crust with the spinach mixture, then the mozzerella and feta cheeses.

Slide onto the preheated baking stone in the oven.
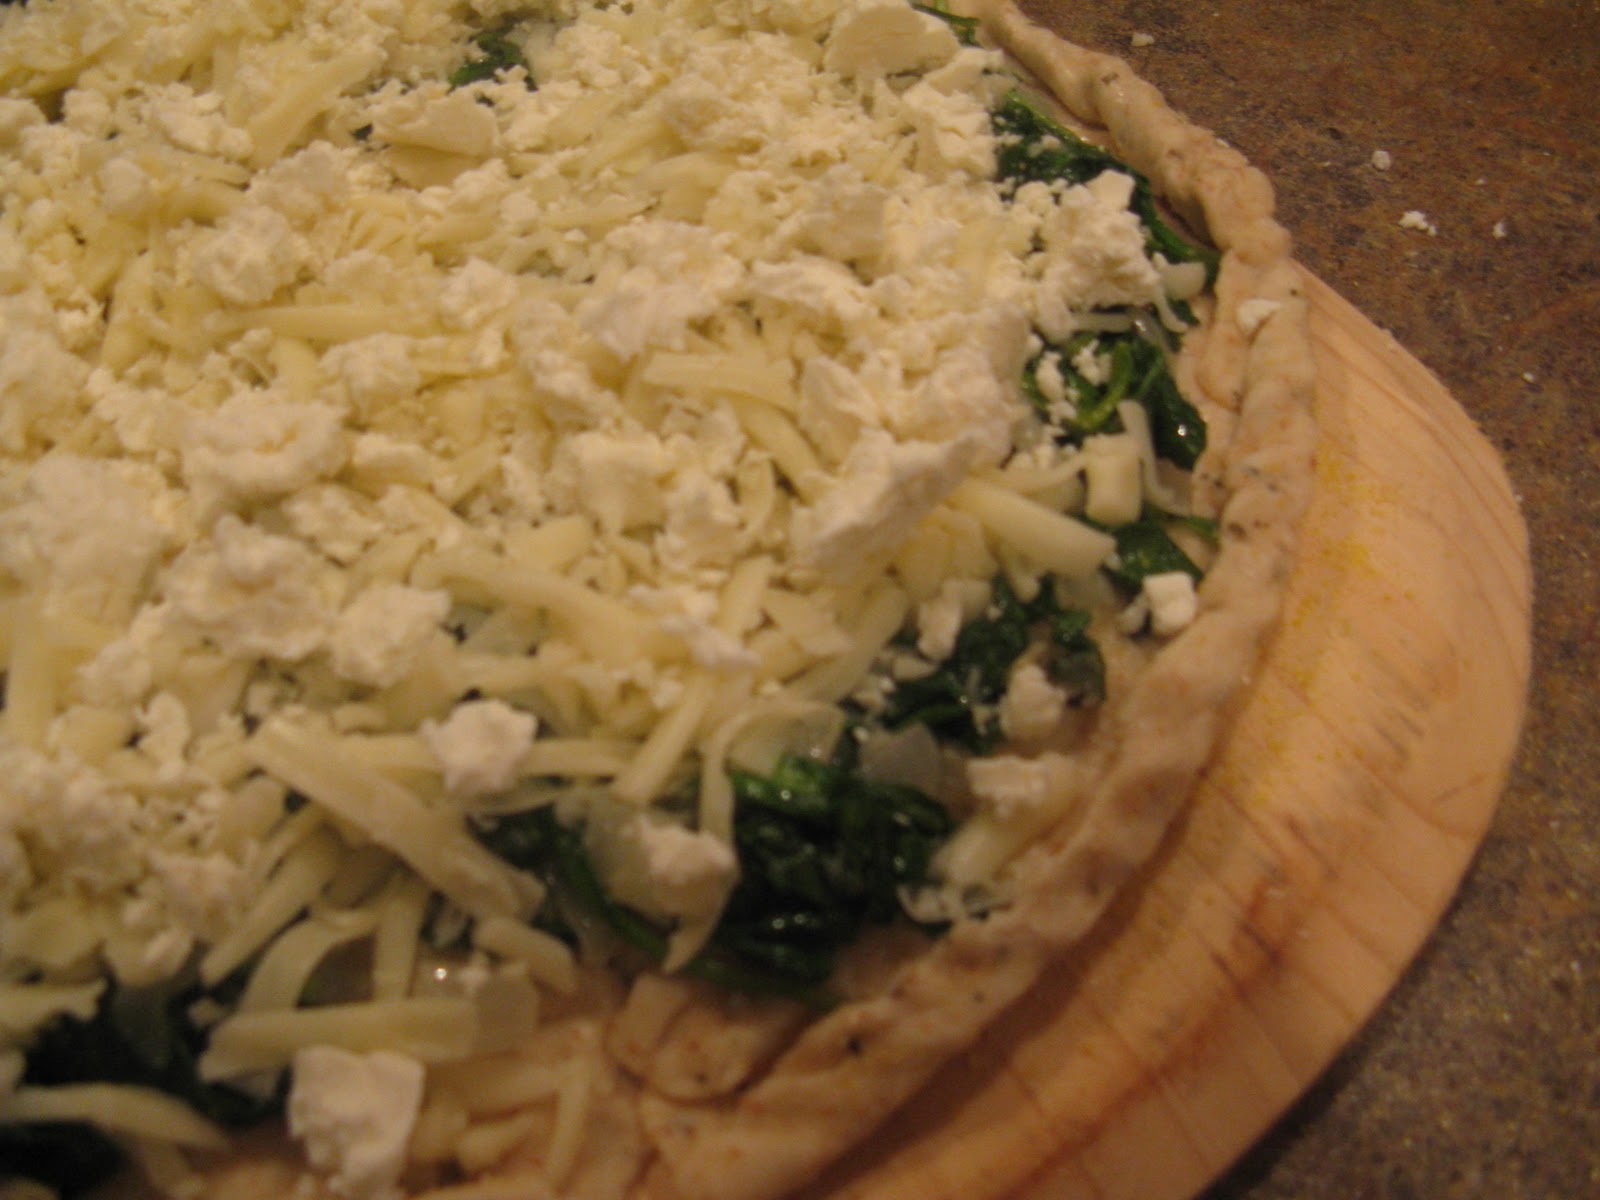

Slide onto the preheated baking stone in the oven.
Watch the magic happen. Bake for 10-15 minutes, or until crust is golden and the cheese is bubbly.
(adapted from Rachael Ray)
Monday, March 7, 2011
Brioche au Chocolat
I'm feeling a little French today. At least in that I am in the mood for a decadent pastry. Unbuckle your belts... this is NOT a low-fat treat :) And, it wouldn't be considered "healthy" either. But, it IS homemade. And that means preservative and additive free!
That's why it is SOoo good. And, it is totally worth the time it takes to prepare. Truly, there is nothing more glorious than breakfast sweets, at least in my opinion!

The two main components of this pastry are the brioche ( a rich, buttery, eggy bread) and the pastry cream.
The nice thing is, that although this recipe doesn't come together in an hour or less, you can break it up into a couple days of work.
I like to make my pastry cream at least the day before, though it can sit in your refrigerator for up to 3 days.
Recipe from "Flour" cookbook
For the Pastry Cream:
1 1/4 cups milk (Whole milk is a must here)
1/2 cup sugar
1/4 cup cake flour
1/2 tsp. kosher salt
4 egg yolks
1 tsp. REAL vanilla extract
(makes ~ 2 cups)
In a medium saucepan, heat the milk until it is scalded, not boiling, but a few bubbles forming around the edge of the pan. While the milk is heating, in a small bowl, stir together the sugar, flour, and salt. In another medium bowl, whisk the egg yolks until blended, then slowly whisk the dry ingredients into the eggs. The mixture will be thick and pasty.
Remove the milk from the heat and SLOWLY, little by little, add it into your egg mixture, whisking constantly. If you go too fast here, you will scramble your eggs. And no one wants scrambled eggs in their pastry cream :) Once the two are fully combined, return the mixture to the saucepan and place it over medium heat.
Whisk constantly and vigorously for 4-5 minutes, or until the mixutre thickens and comes to a boil. At first, it will be very frothy and liquid, but as it cooks it will begin to firm up and the bubbles will disappear. Once it thickens, stop whisking every few seconds to see if it is at a boil, then go right back to whisking. As soon as it comes to a boil, pull it from the heat.
Pour the cream through a fine mesh sieve into a glass bowl, to get out any tiny bits of scrambled egg that might be there. This will ensure an ultra-smooth and shiny pastry cream. At this point you can stir in the vanilla. Cover with plastic wrap, directly onto the surface of the cream. This will prevent a skin from forming on the pastry cream. Chill for at least 4 hours, or up to 3 days.
Whew! Okay, that part is done. Now, onto the brioche :)
Mmmm.... Brioche. So rich. So delicious.
2 1/4 cups unbleached all purpose flour
2 1/4 cups bread flour
1 1/2 pkg. (3 1/4 tsp.) active dry yeast
1/3 cup plus 1 Tbl. sugar
1 Tbl. kosher salt
1/2 cup cold water
5 eggs
1 cup plu 6 Tbl. (2 3/4 sticks) unsalted butter, room temp.
In a stand mixer fitted with the dough hook, combine the dry ingredients with the water and the eggs. Beat on low speed for 3-4 minutes, or until it has come together. Stop the mixure a couple times to scrape the bowl and make sure it is all combined. Once it has come together, beat on low speed for another 3-4 minutes. It will seem quite dry and stiff.
On low speed, add the butter, one small piece at a time, mixing until each addition disappears into the dough. Then, continue to mix on low for about 10 minutes. Occasionally, stop to scrape the sides and bottom of the bowl. It is important that all the butter gets mixed in thoroughly. Once it is incorporated, turn the mixer up to medium, and beat for another 15 minutes, or until the dough becomes sticky, soft and somewhat shiny. This will take some time. It will look questionable at first, but will eventually start to come together and become smooth. At this point, beat on high for 1 minute. The dough should be one mass, slapping the sides of the bowl as it turns.

 (I will warn you that you might feel as though your mixer may take off for a little ride during this process. I found myself holding it down when the dough really thickened up.)
To test the dough, pull at it. It should have some stretch to it. If it seems too wet, add some flour, 1 Tbl. at a time. If the dough pulls apart easily, continue to mix until it becomes stronger and stretchier.

Cover the dough with plastic wrap, pressing it directly onto the dough. Chill for at least 6 hours, or better yet, overnight.
(This could also be done by hand, if you do not have a stand mixer)
The next morning, remove the dough from the bowl. Separate it into 2 balls. (the 2nd may be baked as a loaf or frozen, tightly wrapped for later use.) On a floured surface, roll out one ball into 20" x 10" rectangle. It will be like cold Play-doh and easy to roll out and work with.

 Spread your pastry cream all over the surface. Then, along the long side closest to you, sprinkle 1/2 cup bittersweet or semisweet chocolate chips. Fold the other half over the top of the chocolate chips. Pinch to seal all the edges closed. Then, cut the long rectangle into 2" x 5" strips.
Transfer the strips to a greased baking sheet. (keep them close together, but not quite touching) Allow them to rise, lightly covered with plastic wrap, for about 2 hours, or until the dough becomes soft and pillowy.
That's why it is SOoo good. And, it is totally worth the time it takes to prepare. Truly, there is nothing more glorious than breakfast sweets, at least in my opinion!

The two main components of this pastry are the brioche ( a rich, buttery, eggy bread) and the pastry cream.
The nice thing is, that although this recipe doesn't come together in an hour or less, you can break it up into a couple days of work.
I like to make my pastry cream at least the day before, though it can sit in your refrigerator for up to 3 days.
Recipe from "Flour" cookbook
For the Pastry Cream:
1 1/4 cups milk (Whole milk is a must here)
1/2 cup sugar
1/4 cup cake flour
1/2 tsp. kosher salt
4 egg yolks
1 tsp. REAL vanilla extract
(makes ~ 2 cups)
In a medium saucepan, heat the milk until it is scalded, not boiling, but a few bubbles forming around the edge of the pan. While the milk is heating, in a small bowl, stir together the sugar, flour, and salt. In another medium bowl, whisk the egg yolks until blended, then slowly whisk the dry ingredients into the eggs. The mixture will be thick and pasty.
Remove the milk from the heat and SLOWLY, little by little, add it into your egg mixture, whisking constantly. If you go too fast here, you will scramble your eggs. And no one wants scrambled eggs in their pastry cream :) Once the two are fully combined, return the mixture to the saucepan and place it over medium heat.
Whisk constantly and vigorously for 4-5 minutes, or until the mixutre thickens and comes to a boil. At first, it will be very frothy and liquid, but as it cooks it will begin to firm up and the bubbles will disappear. Once it thickens, stop whisking every few seconds to see if it is at a boil, then go right back to whisking. As soon as it comes to a boil, pull it from the heat.
Pour the cream through a fine mesh sieve into a glass bowl, to get out any tiny bits of scrambled egg that might be there. This will ensure an ultra-smooth and shiny pastry cream. At this point you can stir in the vanilla. Cover with plastic wrap, directly onto the surface of the cream. This will prevent a skin from forming on the pastry cream. Chill for at least 4 hours, or up to 3 days.
Whew! Okay, that part is done. Now, onto the brioche :)
Mmmm.... Brioche. So rich. So delicious.
2 1/4 cups unbleached all purpose flour
2 1/4 cups bread flour
1 1/2 pkg. (3 1/4 tsp.) active dry yeast
1/3 cup plus 1 Tbl. sugar
1 Tbl. kosher salt
1/2 cup cold water
5 eggs
1 cup plu 6 Tbl. (2 3/4 sticks) unsalted butter, room temp.
In a stand mixer fitted with the dough hook, combine the dry ingredients with the water and the eggs. Beat on low speed for 3-4 minutes, or until it has come together. Stop the mixure a couple times to scrape the bowl and make sure it is all combined. Once it has come together, beat on low speed for another 3-4 minutes. It will seem quite dry and stiff.
On low speed, add the butter, one small piece at a time, mixing until each addition disappears into the dough. Then, continue to mix on low for about 10 minutes. Occasionally, stop to scrape the sides and bottom of the bowl. It is important that all the butter gets mixed in thoroughly. Once it is incorporated, turn the mixer up to medium, and beat for another 15 minutes, or until the dough becomes sticky, soft and somewhat shiny. This will take some time. It will look questionable at first, but will eventually start to come together and become smooth. At this point, beat on high for 1 minute. The dough should be one mass, slapping the sides of the bowl as it turns.


To test the dough, pull at it. It should have some stretch to it. If it seems too wet, add some flour, 1 Tbl. at a time. If the dough pulls apart easily, continue to mix until it becomes stronger and stretchier.

(This could also be done by hand, if you do not have a stand mixer)
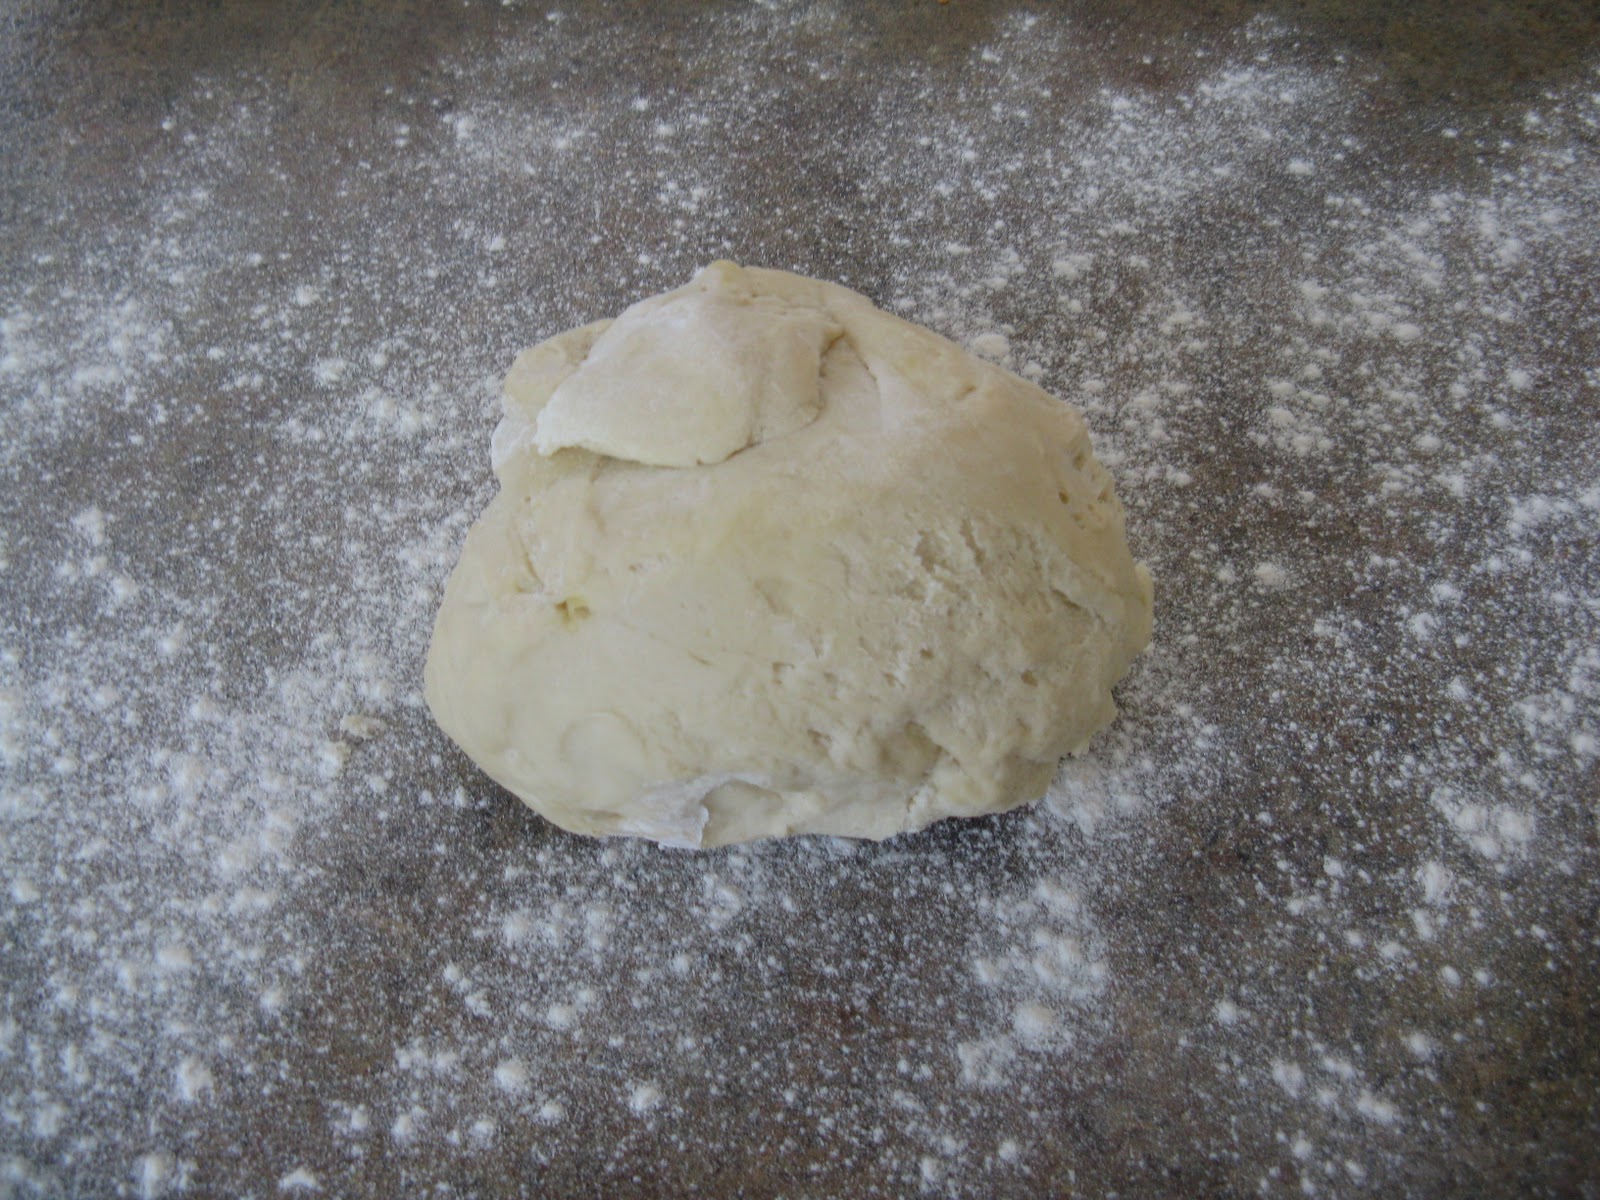
The next morning, remove the dough from the bowl. Separate it into 2 balls. (the 2nd may be baked as a loaf or frozen, tightly wrapped for later use.) On a floured surface, roll out one ball into 20" x 10" rectangle. It will be like cold Play-doh and easy to roll out and work with.


(At this point, you can freeze the pastry, tightly wrapped in plastic wrap. When you are ready to make them, take them out the night before and leave to rise in the refrigerator over night).
Transfer the strips to a greased baking sheet. (keep them close together, but not quite touching) Allow them to rise, lightly covered with plastic wrap, for about 2 hours, or until the dough becomes soft and pillowy.
Brush the tops with 1 beaten egg. Bake at 350 degrees for around 35 minutes or until the tops are golden brown. Cool for 15-20 minutes (if you can stand the wait!).
Feast!!!
Friday, March 4, 2011
Not your Average Meatball.
Homemade Spaghetti and Meatballs ~ the quintescential Italian dish. Today we've kicked the standard up a notch. Today, it's all about Big, beefy Meatballs with Bucatini Pasta and a chunky marinara down over the top. And, that is truly what this dish is ~ over the top. Delicious.

What is Bucatini, you ask? Well, bucatini is long like spaghetti, but is thicker and has a hollow center like penne. And it is a very fun pasta to eat. You could substitute any long pasta if you can't find bucatini.
This dish has 3 parts.
1. Meatballs
2. Pasta
3. Sauce
Let's begin with the meatballs~
1 1/2 pounds ground beef, sirloin, or chuck
1/2 a large yellow onion, grated (the juice makes meatballs moist)
3 cloves garlic, minced
1 egg
1/2 cup Italian breadcrumbs (Panko style even better)
1/2 cup freshly grated Parmesan
1/4 tsp. freshly grated nutmeg
3 Tbl. capers, drained and chopped
1 tsp. ground sage
Handful of chopped, fresh flat-leaf parsely
Salt and Pepper
Healthy drizzle of extra virgin Olive oil
Mix these ingredients in a large bowl. Your hands are the best tool for this one, but be sure to take off your rings first :) Don't overmix. Just until the mixture comes together. No one likes a tough meatball :)
Then, score the meat into 4 sections, making 3 large meatballs from each section. You should have 12.
(I had more in my picture, because I made a larger batch for company)

Arrange the meatballs on a large sheet pan that has been greased. Bake at 400 degrees for 15-20 minutes, until the meatballs are firm, but not hard.
Meanwhile, begin the Sauce~


What is Bucatini, you ask? Well, bucatini is long like spaghetti, but is thicker and has a hollow center like penne. And it is a very fun pasta to eat. You could substitute any long pasta if you can't find bucatini.
This dish has 3 parts.
1. Meatballs
2. Pasta
3. Sauce
Let's begin with the meatballs~
1 1/2 pounds ground beef, sirloin, or chuck
1/2 a large yellow onion, grated (the juice makes meatballs moist)
3 cloves garlic, minced
1 egg
1/2 cup Italian breadcrumbs (Panko style even better)
1/2 cup freshly grated Parmesan
1/4 tsp. freshly grated nutmeg
3 Tbl. capers, drained and chopped
1 tsp. ground sage
Handful of chopped, fresh flat-leaf parsely
Salt and Pepper
Healthy drizzle of extra virgin Olive oil
Mix these ingredients in a large bowl. Your hands are the best tool for this one, but be sure to take off your rings first :) Don't overmix. Just until the mixture comes together. No one likes a tough meatball :)
Then, score the meat into 4 sections, making 3 large meatballs from each section. You should have 12.
(I had more in my picture, because I made a larger batch for company)

Arrange the meatballs on a large sheet pan that has been greased. Bake at 400 degrees for 15-20 minutes, until the meatballs are firm, but not hard.
Meanwhile, begin the Sauce~
1 Tbl. olive oil
1/4 lb. bacon or pancetta, chopped
3 cloves garlic, minced
10 crimini mushrooms (baby portobellas) finely chopped
Salt and Pepper
1/2 a large yellow onion, finley chopped
1/2- 3/4 cup dry red wine1 cup beef stock, more if needed
1 28 oz. can crushed tomatoes
1 28 oz. can crushed tomatoes
Handful of chopped flat leaf parsley
Fresh basil, chopped (optional)
In a large saute pan over medium high heat, drizzle your olive oil and add your chopped bacon. (Bacon will give a smokier flavor than the pancetta.) Cook for about 5 minutes until bacon begins to caramelize and brown. Then add chopped mushrooms and garlic, cooking another 5 minutes. Season with salt and pepper. Add the chopped onion and deglaze the pan with red wine, scraping up any brown bits on the bottom of the pan. Stir in the tomatoes and parsely. Simmer for 5-10 minutes, tasting to adjust seasonings.


If you like a less chunky sauce, you can puree it some with a hand mixer or in a food processer. But, leave it with a little texture.
Finally, the easy part, bring a large pot of COLD water to a rolling boil for your pasta. Salt generously with salt. Cook 1 lb. bucatini until al dente. Drain and toss with half of your sauce. Plate with meatballs, more sauce, and grated parmesan.
There you have it. A dish worthy of sharing with company, and a delight for the tastebuds.
Tuesday, March 1, 2011
Twist on a Classic ~ Pimento Mac & Cheese
If you are from the South, chances are, you are familiar with an old stand-by ~ Pimento Cheese.
Let's begin, shall we! The sooner we can eat :)
Begin with 1 lb. of short pasta. You want one that will hold onto the cheese sauce, so holes and ridges are a good thing (macaroni, cavatappi, etc.) I decided to use half Rice pasta, as it makes for a lower gluten meal, but still having the flavor of regular durum pasta.

Cook the pasta just shy of al dente. It will continue to cook when we put it in the oven later. Drain it and reserve. DO NOT rinse it with water.
Meanwhile, in a separate pot, heat your olive oil and butter over medium heat. Once the butter has melted, add your onion, garlic, salt and pepper. Cook until the onion begins to soften, about 5 minutes. Then, add the paprika. This will give it lots of intense color.
Add the flour, stirring and cooking for a minute more ~ we are making our roux (or thickener). Whisk in milk and hot sauce and bring to a bubble to thicken the sauce, stirring often. Then turn off the heat. This will only take a minute or two. Stir in the cheese until it melts into the sauce.


Commonly used on crackers or sandwiches, today, we are switching it up a bit and turning it into a pasta dish! (thanks to Rachael Ray's imagination ;)
Pimentos are really nothing more than a red bell pepper, just a bit sweeter. And, in this preparation, we are using the jarred variety.Let's begin, shall we! The sooner we can eat :)
Begin with 1 lb. of short pasta. You want one that will hold onto the cheese sauce, so holes and ridges are a good thing (macaroni, cavatappi, etc.) I decided to use half Rice pasta, as it makes for a lower gluten meal, but still having the flavor of regular durum pasta.

Bring a large pot of water to a boil. Be sure to use a nice, large pot, and fill it with a lot of water to give the pasta room to groove. Once the water is at a rolling boil, salt it generously. Should be salty like the sea. This is your only chance to flavor the pasta itself.
Meanwhile, in a separate pot, heat your olive oil and butter over medium heat. Once the butter has melted, add your onion, garlic, salt and pepper. Cook until the onion begins to soften, about 5 minutes. Then, add the paprika. This will give it lots of intense color.
Add the flour, stirring and cooking for a minute more ~ we are making our roux (or thickener). Whisk in milk and hot sauce and bring to a bubble to thicken the sauce, stirring often. Then turn off the heat. This will only take a minute or two. Stir in the cheese until it melts into the sauce.


Add the drained pasta to the cheese sauce. Stir together. Then stir in drained pimentos.
Pour into a baking dish and sprinkle with remaining cheese.


Bake at 425 or broil just until the cheese is nice and melted.
Garnish with fresh flat leaf parsley (if you have some, which I did not :)

And, there you have it. A delicious twist on a classic.
Ingredients:
1 lb. short pasta (macaroni, cavatappi, etc.)
Salt
1 tbl. olive oil
3 tbl. butter
1/2 large yellow onion, finely chopped
3 cloves garlic, minced or grated
2 tbl. sweet Paprika, plus more for garnish
Salt and pepper
3 tbl. flour
2 cups milk
2 tsp. hot sauce
3 cups sharp yellow cheddar, grated
2 4-oz. jars chopped pimentos, drained
chopped flat leaf parsley for garnish (optional)
1 lb. short pasta (macaroni, cavatappi, etc.)
Salt
1 tbl. olive oil
3 tbl. butter
1/2 large yellow onion, finely chopped
3 cloves garlic, minced or grated
2 tbl. sweet Paprika, plus more for garnish
Salt and pepper
3 tbl. flour
2 cups milk
2 tsp. hot sauce
3 cups sharp yellow cheddar, grated
2 4-oz. jars chopped pimentos, drained
chopped flat leaf parsley for garnish (optional)
Sunday, February 27, 2011
Senegalese Peanut Chicken Stew
If you are tired of hum-dru dinner fare... then you MUST make this stew! It combines flavors and ingredients that some may not have tried before. But, it is a great first step out of the dinner "box" in which we can find ourselves stuck. This stew is hardy and delicious and will go a long way. And, if I'm not mistaken, leave you the Queen (or King) of your kitchen among those who taste its subtly bold flavors ( oxymoron, I know, but try it and you will understand :)

 Ingredients:
2 Tbl. sesame oil
2 Tbl. butter
1 large yellow onion, diced
1 green bell pepper, large dice
2 carrots, large chop
1 heaping Tbl. fresh ginger, grated/minced
2 Tbl. garlic, grated/minced
2 bay leaves
1 large sweet potato, peeled and chopped
4-5 small red potatoes, quartered
1 28 oz. can crushed tomatoes
1/3 cup white wine, preferrably dry
2 Tbl. lemon juice
3-4 cups chicken broth/stock
1 Tbl. hot chili sauce, Sriracha, more or less to your liking
2 Tbl. brown sugar
1 Tbl. curry powder
3/4 cup natural peanut putter
2-3 cups, cooked chopped/shredded chicken
1 1/2 cups frozen peas, thawed
Salt and Pepper
Chopped fresh Cilantro for garnish
*Makes one large pot of stew*
In a large, heavy bottomed pot, heat sesame oil and butter over medium-high heat. When butter has melted, add chopped onion, carrots, and bell pepper, stirring occasionaly until the vegetables have begun to soften ~ 5 minutes.
Add garlic, ginger, and bay leaves, cooking for another 5 minutes.
 .
.
Pour the white wine into the pot and stir to release the brown bits from the bottom of your pan. These are those tasty gold nuggets of flavor. You could also use chicken stock, if you do not want to use wine.
Now, it's time for the potatoes, sweet potatoes, tomatos, and 3-4 cups of chicken stock.
~ I prefer chicken stock over broth as it has a richer flavor~

Bring stew to a boil over high heat, then reduce to a slow simmer until potatoes are fork tender.
Stir in lemon juice, chili sauce (more or less to your liking), brown sugar, curry powder, and peanut butter until blended through.
Finally, add your cooked chicken and peas and simmer for 10-15 minutes. Salt and Pepper to taste, and adjust any of the seasonings to your liking.
If you would like a thinner consistency, add more stock/broth, 1 cup at a time.
Sprinkle with fresh cilantro on top. Serve and Enjoy!!


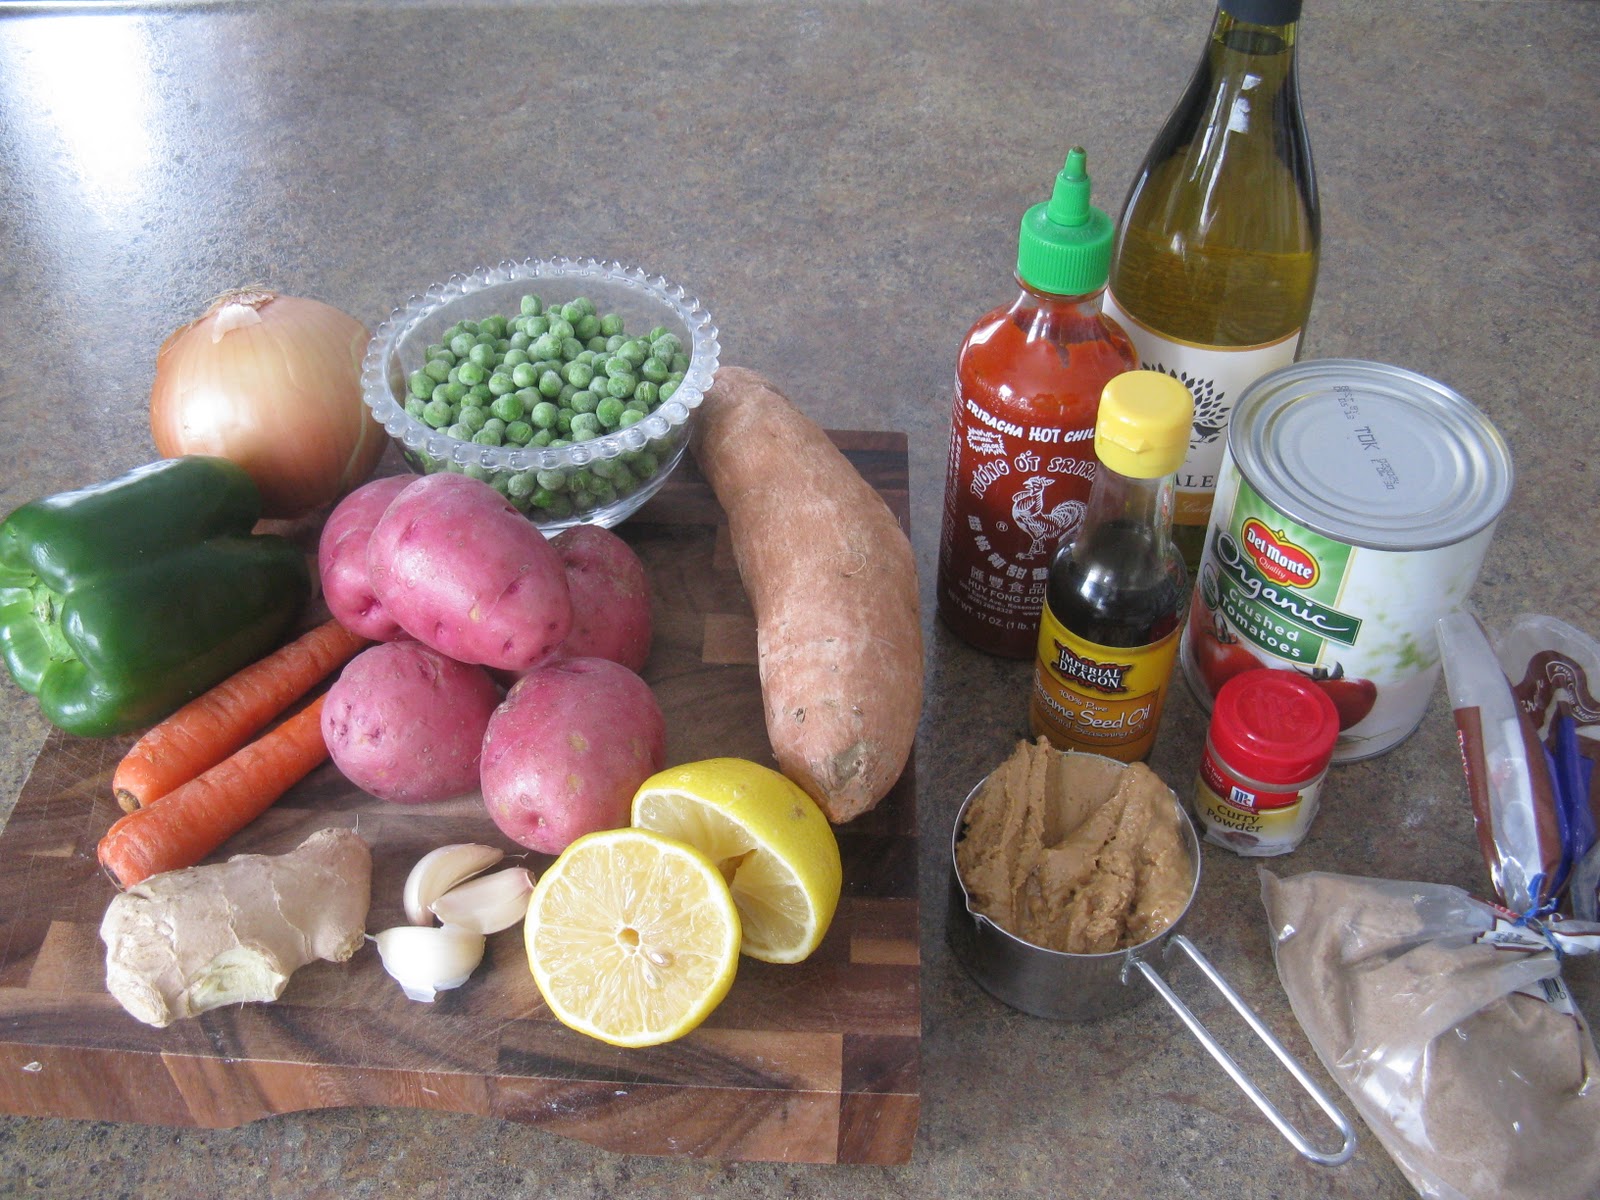
2 Tbl. sesame oil
2 Tbl. butter
1 large yellow onion, diced
1 green bell pepper, large dice
2 carrots, large chop
1 heaping Tbl. fresh ginger, grated/minced
2 Tbl. garlic, grated/minced
2 bay leaves
1 large sweet potato, peeled and chopped
4-5 small red potatoes, quartered
1 28 oz. can crushed tomatoes
1/3 cup white wine, preferrably dry
2 Tbl. lemon juice
3-4 cups chicken broth/stock
1 Tbl. hot chili sauce, Sriracha, more or less to your liking
2 Tbl. brown sugar
1 Tbl. curry powder
3/4 cup natural peanut putter
2-3 cups, cooked chopped/shredded chicken
1 1/2 cups frozen peas, thawed
Salt and Pepper
Chopped fresh Cilantro for garnish
*Makes one large pot of stew*
In a large, heavy bottomed pot, heat sesame oil and butter over medium-high heat. When butter has melted, add chopped onion, carrots, and bell pepper, stirring occasionaly until the vegetables have begun to soften ~ 5 minutes.
Add garlic, ginger, and bay leaves, cooking for another 5 minutes.

Pour the white wine into the pot and stir to release the brown bits from the bottom of your pan. These are those tasty gold nuggets of flavor. You could also use chicken stock, if you do not want to use wine.
Now, it's time for the potatoes, sweet potatoes, tomatos, and 3-4 cups of chicken stock.
~ I prefer chicken stock over broth as it has a richer flavor~

Bring stew to a boil over high heat, then reduce to a slow simmer until potatoes are fork tender.
Stir in lemon juice, chili sauce (more or less to your liking), brown sugar, curry powder, and peanut butter until blended through.
Finally, add your cooked chicken and peas and simmer for 10-15 minutes. Salt and Pepper to taste, and adjust any of the seasonings to your liking.
If you would like a thinner consistency, add more stock/broth, 1 cup at a time.
Sprinkle with fresh cilantro on top. Serve and Enjoy!!

Saturday, February 19, 2011
Banana Walnut Chocolate Chunk Cookies (aka sweet goodness)
My husband's favorite things are anything with banana. So, these were especially for him :)
Now, if I can just decide which is better... the amazing aroma these emit throughout the house, or the way they taste in my mouth...?... You decide for yourself!

To begin, measure your all purpose flour, whole wheat flour, salt, and baking soda. into a bowl, and whisk them together. This helps to incorporate air and make for a lighter textured cookie.

I like to use Whole Wheat Pastry flour as it is more finely ground than regular wheat flour. Just makes for better texture for cookies, cakes, and pastries.
Then, in the bowl of a mixer, with the paddle attachment, place your butter, and sugars. ( I doubled the recipe as I like a lot of cookies at one time, and freeze half :) Beat them until light and fluffy, a couple minutes. Then, add your egg and vanilla. Mix to combine.


Okay, here's where those overripe bananas come into play. I know they don't look pretty, but this is exactly how you want them. Black bananas have a TON of natural sweetness. Mash your banana.


Whip the banana into the butter mixture, JUST to combine. (Will look a bit separated.) Slowly, add in your flour mixture. Again, just to combine. You don't want a tough cookie.

Toast your walnut pieces on the stove. This takes just a couple minutes. Be sure to keep a close eye (nose) on these. They can burn fast! As soon as you start smelling them, they are done. Take them off the heat. This part should actually be done earlier, so they have a few minutes to cool down before adding them to the batter.

Add the walnuts, oats, and chocolate chips. Mix just to combine. I like to use Bittersweet and semisweet chocolate.

Almost done!!... Bake the cookies at 375 degrees for 14-16 minutes. Or until golden brown.


Ingredients:


1/2 c. whole wheat flour (or whole wheat PASTRY flour)
1 tsp. course salt
1/2 tsp. baking soda
3/4 c. (1 1/2 sticks) unsalted butter, room temp.
1/3 c. granulated sugar
1/3 c. granulated sugar
1/3 c. packed brown sugar
1 lg. egg
1 1/2 tsp. PURE vanilla extract
1/2 c. mashed ripe banana (about 1 large)
1 c. old fashioned rolled oats
1 1/2 c. semi or bittersweet chocolate chips
1/2 c. coursely chopped walnuts, toasted


Subscribe to:
Posts (Atom)